Super Big Bore
Shock Set-up |
Here's some buggy and truggy shock setups for the new Super Big Bore 16mm shocks. The oil used in the new shocks is alot more critical to outside air temperature so that should be taken into consideration.
Buggy shock setups...
Spring...........silver/chrome front and rear
Shock end.....short front, long rear (screwed all the way in, but adjusted so left and right sides are equal)
Piston........1.4mm 6 hole
Losi Oil.... Outside temp 95+ ( 45 front, 35 rear) Temp 80-90 (40 front, 30 rear) Temp 60-70 (37.5 or 35 front, 27.5 or 25 rear)
Truggy (CRT) shock setups...
Spring...............Blue front and rear
Shock end.........short front, long rear (screwed all the way in, but adjusted so left and right shocks are equal lengths)
Piston...............1.4mm 6 hole
Losi Oil 50wt front, 40 rear during the day 45wt front, 35 rear if its cooler
Chad |
Clutch
Set-up |
The Jammin X1-CR & X1-CRT original equipment includes aluminum clutch shoes. In order to get them to perform consistent throughout the life of the shoe, there are a few things I do to them upon initial set-up.
X1-CR Blue Shoes with 1.0mm springs. Be sure that the shoe fit on the flywheel pin is free and will rotate with only the weight of the shoe (no spring). If they are at all tight, I drill out the pin hole in the clutch shoe to allow for the clutch dust build-up. Use a # 38 drill bit. Be careful while drilling because the anodizing may gaul up and seize the bit.
X1-CRT Blue Shoes with 1.1mm springs. Use the same process above to free up the pin hole. I also widen the gap where the spring coil fits to allow clearance for this thicker spring. Use a hand file or Dremel tool and take some material from the inside surfaces of the gap (the area around the pin hole) to allow the spring to slide in the gap with little or no interference.
Be sure to use the small washer shims on the flywheel pin between the shoe and flywheel. This allows the shoe to move free when a bur develops from wear. I also use Acer Ceramic 5x10mm bearings in the clutch. They withstand the extreme heat better and will last longer than the original steel. |
| Sway Bars |
The Jammin X1-CR & X1-CRT sway bars mount on the front and rear bulkheads with plastic straps holding them in place. The center hole in the plastic strap is for a 3mm x 5mm set screw used as an adjuster to eliminate the excessive play when using different diameter bars. Before you connect the sway bar links, tighten the set screws until you feel friction on the bar while moving up and down through the travel. Back the set screw off so there is just the slightest amount of friction.
This adjustment makes the sway bar react to the slightest amount of chassis roll and will keep the chassis centered better. Frequently check the play in the set screws since they will wear and require adjusting. |
| Shock Adjusters |
The Jammin X1-CR & X1-CRT shocks have threaded shock adjusters to make quick and accurate spring pre load adjustments. When I build the shocks for the first time, I turn the shock adjusters all the way to the top of the shocks and make a reference mark on the adjuster nut, so that I can refer to these marks when tuning the car or relaying to my pit crew to make a track side adjustment.
I use a cutting disk on a Dremel and grind a slot into the adjuster. I will align the slot so it faces rearward for the rear shocks, and forward for the front shocks. Some guys use paint or a marker, but it tends to wear off over time. |
| X1-CR Body Mount |
The rear body mount on the X1-CR can be lowered down. This allows for more direct air flow over the engine head fins for more cooling and gives the car a lower look. Move the mount & screw to the lower hole of the tower and the centering pin will hang into the relief area of the tower. You may need to trim some of the centering pin on the mount for it to fit properly. |
| Shock Building |
When assembling the shocks, be sure to snap the "O" ring retainer clip into the shock body with the sharp edge of the clip facing outward. This gives it a more positive lock. You can also stretch the clip to make it slightly larger diameter. This is just a little insurance to keep the clip from popping out. To better hold the retainer clip for o-ring assemble, carefully put a drop of thick CA glue on the tip of an exacto blade and lightly lay the glue on the outer part of the clip. |
| Long Wheelbase |
I have found that you may increase the wheelbase by 2mm of the CRT or CR by simply reversing the rear hubs left to right. During testing on the CRT, this modification let the truck go through the bumps on a very rough track more predictable. The truck also had more steering from the middle to exit of the turn. I have not yet experimented on the CR buggy, but it is worth trying. |
| Brakes |
A common question I hear in the pits is about brake set-up and how to keep them from sticking. The most common problem I see is that there is too much free play in the calipers. I set up my brakes with very little free play between the calipers and brake disk(s). Either with the fiber disks or steel disks. Be sure to assemble the calipers so that the slotted hole is on the right side (passenger) of the car/truck. This is the side that swings when the cam is applied for braking. Another trick is to remove the corners from the cams that are not used during braking. These corners can hit the center diff. or the opposite side of the caliper depending on how much throw you have in the linkage. Simply grind these corners to a small radius. |
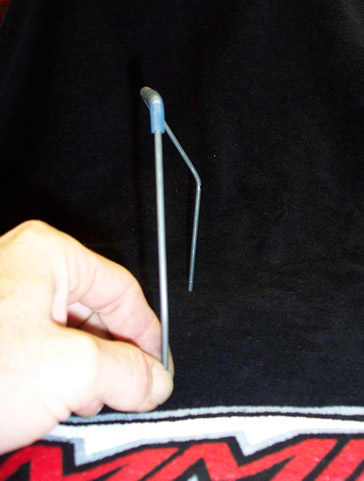
| Fuel Tank Lid |
The Jammin tanks have an adjustable pressure nipple on the fuel tank lid. This nipple can be rotated to any position to accommodate your fuel line routing. It is important that this area stays sealed. I put a little longer screw in the pressure nipple assembly on the center of the fuel filler cap. I use a drop of glue on the bottom threads of the screw. Once I position the nipple where I want it, I glue around the circle part with a thin bead of thick glue (Pro-line works well). Us the straw insert to make it easier. Be sure the screw is not too long as it will start to push the plastic out the bottom side and crack the cap. |
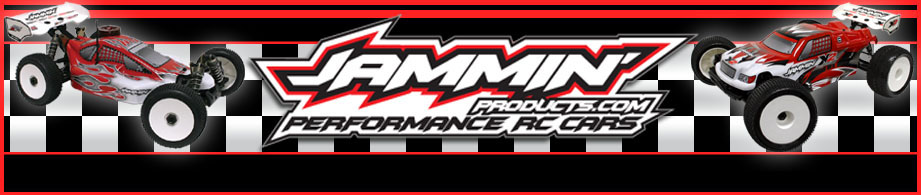
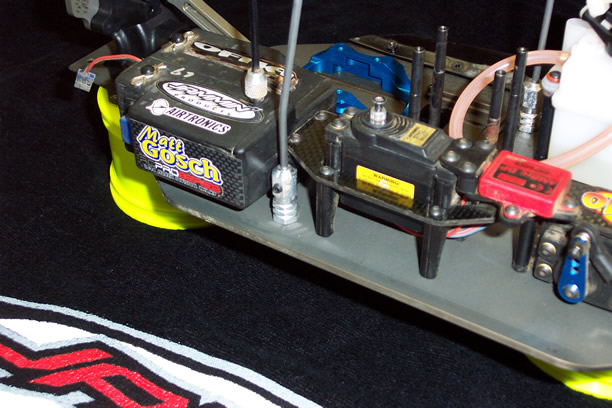
| Roll Bar |
Matt Gosch's X1-CRT has a trick roll bar made by his Dad, Chris. It fits under the body and helps prevent body damage. The body will last three times longer with this simple roll bar. This requires drilling two holes in the chassis and countersinking them. The bar is fabricated from 0.090" to 0.125" piano wire available at most hobby stores. Click on the links to see pictures. Roll bar, Top View, Right Side View, Left Side View |
| Differentials |
To keep the differentials from developing leaks around the seal, I do a couple things during assembly.
With very fine sand paper (400 grit) sand down the diff case (the area that the paper gasket is sandwiched between the gear and diff case), Do figure 8 motions while holding the diff case in different spots. Look to see that the whole surface area of the diff case is sanded down very lightly. This helps the diff gear (Ring) rotate more true and helps with leak issues.
Don't go too far or the diff. shimming will be off.
When you assemble the diff for the first time, use a paint pen to index the gear to the case with a mark on each so that after a rebuild the gear and case match up exactly every time. This allows for a better seal as well as keeps the gears running true.
Always use just one shim behind each small bevel gear. Never use two. If the gears are worn beyond one shim, then replace the gears with new. |
| Steering |
Here's a little M8 or M11 radio tip for the smoothest, most precise steering response out of your Airtronics radio.... Before you set end points for your steering, also make sure the Dual rate dial on the grip is set to max also, then go to the D/R (dual rate) icon on the radio screen and bump it up to the max 150% (the stock setting is 100%) and from there set your end points (epa) and the trims. maximize out the D/R and then setting your epa will give you more points throughout your steering throw. If you want to do a test set your internal D/R at 50% then set your EPA (end point adjustment) to where you normally have it (which is usually max throw for off road racing) and you'll notice that when you turn your radio on and turn your steering with the radio that the servo has gaps between inputs. putting your internal D/R to max will completely fill in these areas. However if you like to set your radio up where you have room to add D/R during your run leave the internal D/R at 100% so you have room to add D/R with the dial on the grip. I like the most possible steering throw when i set my radio up at first so I'm already at max. |
| Batteries |
If you are using Lipo receiver batteries, HT Batteries, suggests to keep some partial charge (70%) in the batteries if you are going to store them for a long period of time. If they are stored in a dead state, they may not accept a charge when the time comes. |
| Switch |
I see this simple little mistake cause a lot of damage. Be sure to install your on-off switch so that the "on" position is down. The "G" force upon re-entry can cause the switch to turn off and then the car usually self destructs. |
| Maintenance |
What I check after I run each time..... Hinge Pins... When you use the option hinge pins (the ones held together with the nut), an easy way to check if they 're bent or need cleaning is simple and you don't need to disassemble. Just simply insert the allen wrench in the hinge pin and spin (make sure first you don't over tighten the nut) if the front caster block or rear hubs wobble most likely the hinge pin is bent and should be replaced. Same goes with the inner pins. If you feel the pin is spin smooth then tight , it could be bent as well. If it feels gritty or tight most likely it needs to be cleaned. Clutch... Usually about 3-5 runs (and before every long main) I pull the engine out and check to see if the clutch bearings feel gritty, if they do replace right away. I also check out to see what condition the shoes are in and see if they are hung up or any build up of aluminum has happened around the shoe (usually this can be taken off with a file or sharp Exacto blade). Shocks... Usually about 3-5 runs, I pull the shocks off the car and check to see if the shock boots have a tear or a hole in them. If they don't, more than likely the oil should still be good (the coating on the Jammin shock bodies is really good and the only way I've found that the oil gets dirty is if there's build up of dirt below the o-rings of the shock body). I like to maybe change out the shock oil regardless about 7-10 runs. and if I'm only racing club races i would replace the bladder and o-rings about every 4 club races. Diffs... I like to change out the oil about every 3 club races. if it's a major event sometimes I can go the whole event without doing it, but most of the time I will run practice and qualifying and then change out the oil before running the main event. Drive train... I check to see any wear on the out drive cups. If there is, I replace it right away. I check to see that my bearings are spinning freely and smoothly. A gritty bearing can quickly become seized and could damage the housing that it's installed in, so replace or clean and re-oil right away. |
| Anti Squat |
I like to adjust the anti squat for the ruts. A majority of the time, if the track is smooth, I like the 2 degree block. Generally on a smooth track the 2 degree block is always best. But depending on the shape of the ruts or how fast you're hitting them determines if more or less is better. Let us say you're driving full throttle down a straight away that's pretty rutted and you're hitting the bumps at a pretty high rate of speed. More anti squat is better because its not allowing your car to bottom out. If you're driving out of a tight turn and it's rutty on the exit, less would be better. And if a jump is rutty on the face (and is causing car to jump inconsistent), then less is better most of the time. The shape of the bump will also determine which is better. Sharp rut (pot hole type) more anti squat is better. Rolling rut (usually seen on loamy tracks) less is better. When I say less anti squat, I'm referring to the 1 degree and more is the 2 or 2.5. I haven't yet tried the 3 on the buggy. It also has an effect on how much your car squats on throttle. More anti squat is less squat and vice versa. |
| Body Prep |
Butch Hedrick writes in a tip for keeping the body in good shape. He uses an adhesive on the inside to both strengthen the body and protect the paint. The product is E6000 Multi Purpose Adhesive - Medium Viscosity and is available at most good craft stores. Just apply by finger to the inside of the body over the paint in a thin layer anywhere the body rubs on parts or where the body has a tendency to develop cracks or tears from abuse. Be careful when putting over low quality spray can type paint, as it may smear the paint if you try to work the adhesive too much. Let the product dry for a few hours and apply a second coat if needed. |
| CR-FTE Building |
Steve Dunn donates this advice. The mounting screws for rear Billet Aluminum "B" Block of the lower front suspension mount requires shorter screws. These screws (12mm long) are supplied in a separate bag. If the standard screws (16mm long) that are supplied for the plastic mount are used (as shown in the instruction book), they are too long and will interfere with the screws that hold the rear of the gear box to the chassis. This will cause the gear box to keep coming loose. |


